 Spring Framework 源码拉取编译技巧
# 目的
为了快速的拉取Spring Framework的源码,并且正确的编译好,如果你不做默认设置,这个过程可能会持续几个小时 慢的原因:
- gradle 的配置 --->>> 用自己的gradle
- 镜像仓库的配置 --->>> 配置国内镜像
# 获取源码
建议从官方的仓库 (opens new window)fork到自己的仓库中, 因为这样你后期做什么调整,也可以保存到自己的项目中不会丢失。 我这里是基于5.3.x来做的演示
fork 到自己的仓库之后,在idea上直接拉取自己仓库的代码
# 拉取代码
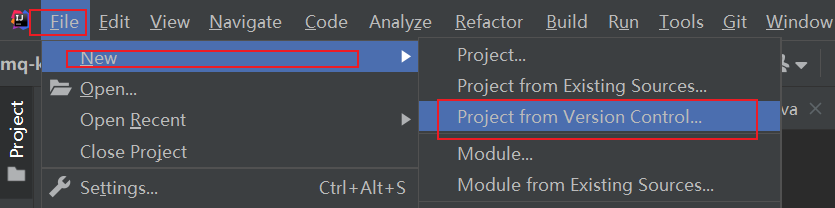
我这里演示的是通过idea的方式拉去,当然你也可以直接使用git命令行的方式取拉去
通过git的方式来创建一个新的成功
我这里输入的地址,是我之前就伤上传到自己的仓库,你们用自己fork的仓库即可
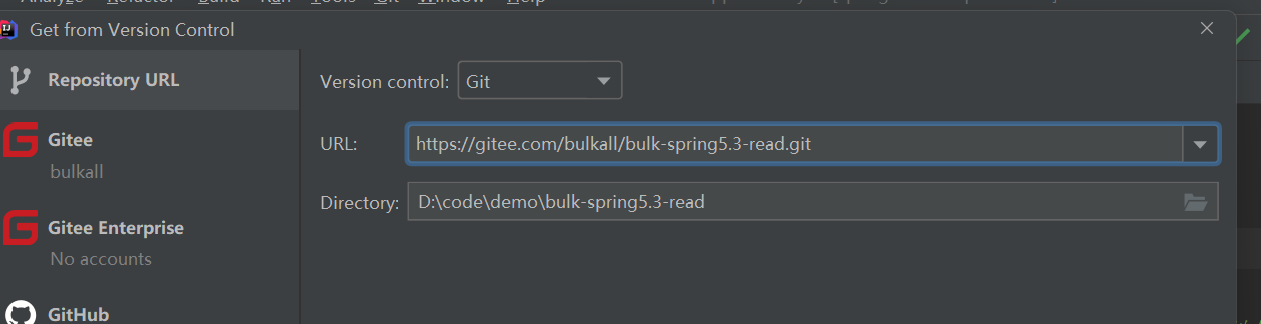
点击 clone
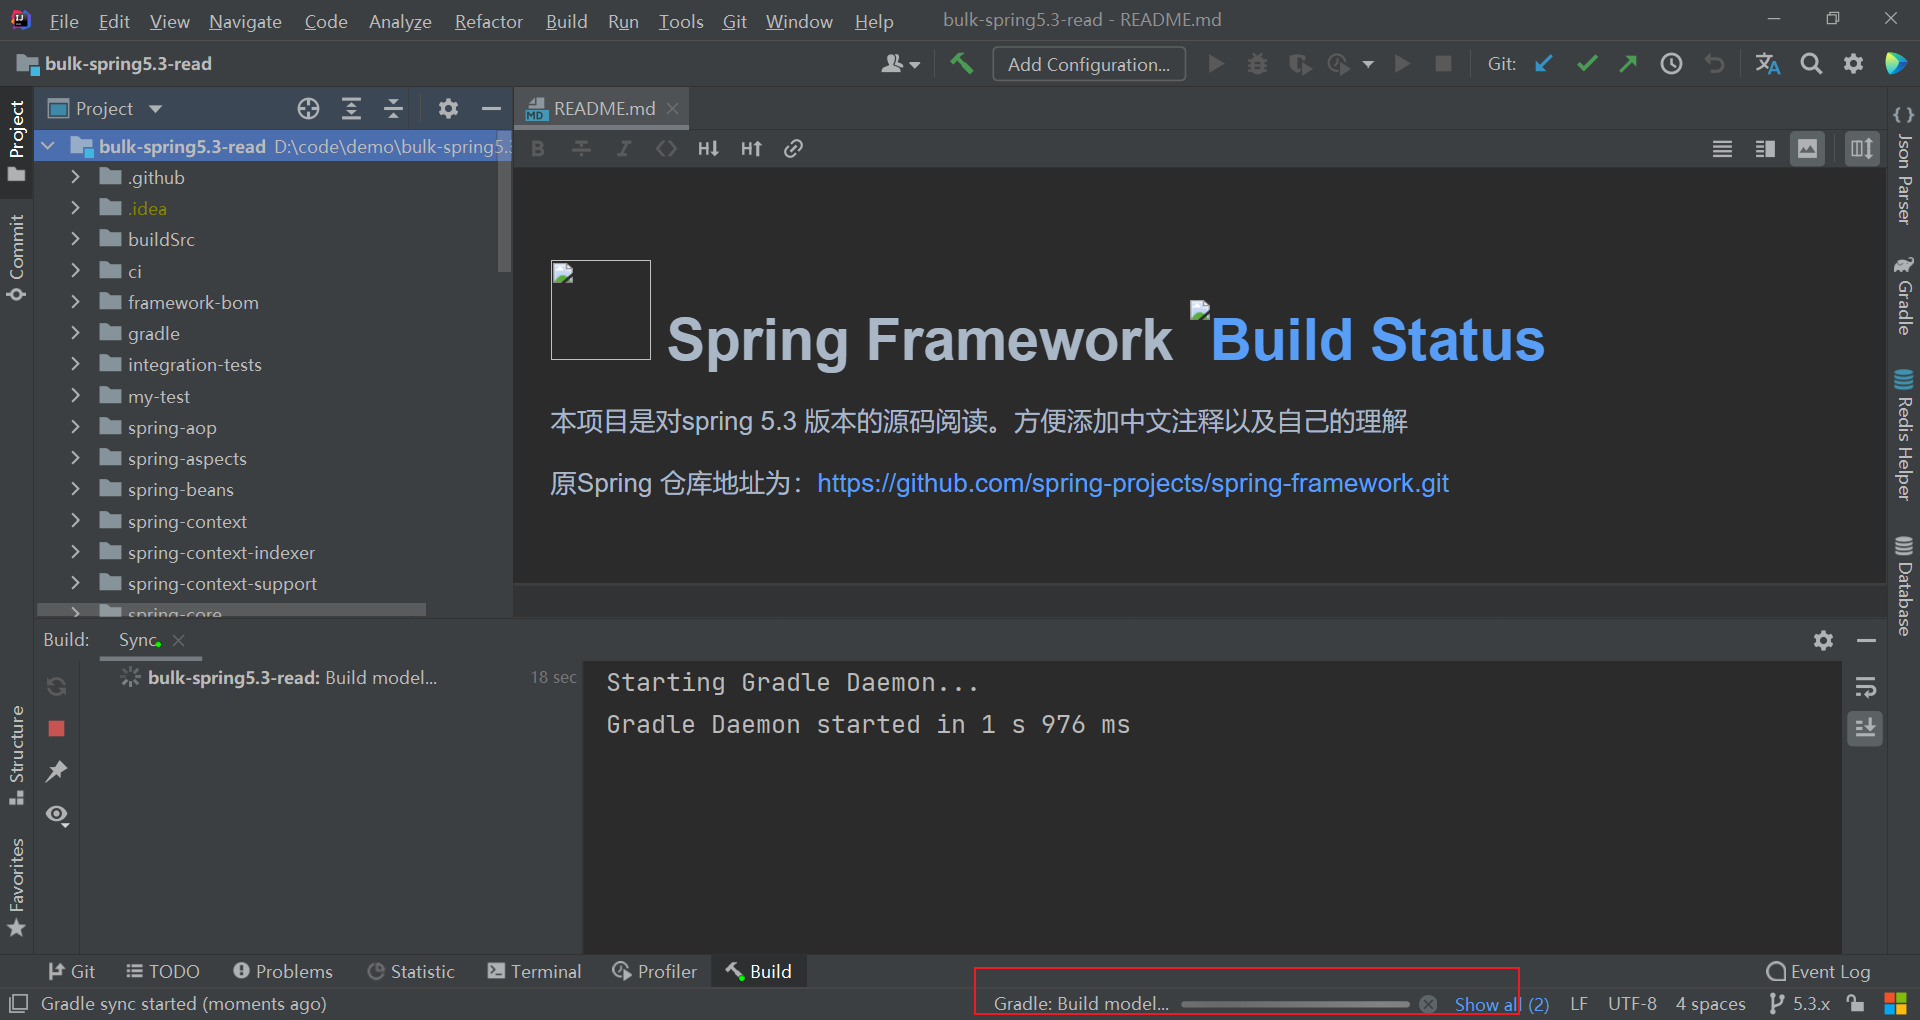
然后等他代码拉下来,右下角开始跑进度的时候,点击叉号,停止当前的idea操作,这一步的目的是为了配置gradle。当然,如果你之前已经做了idea默认的gradle的配置,则不要做如下配置
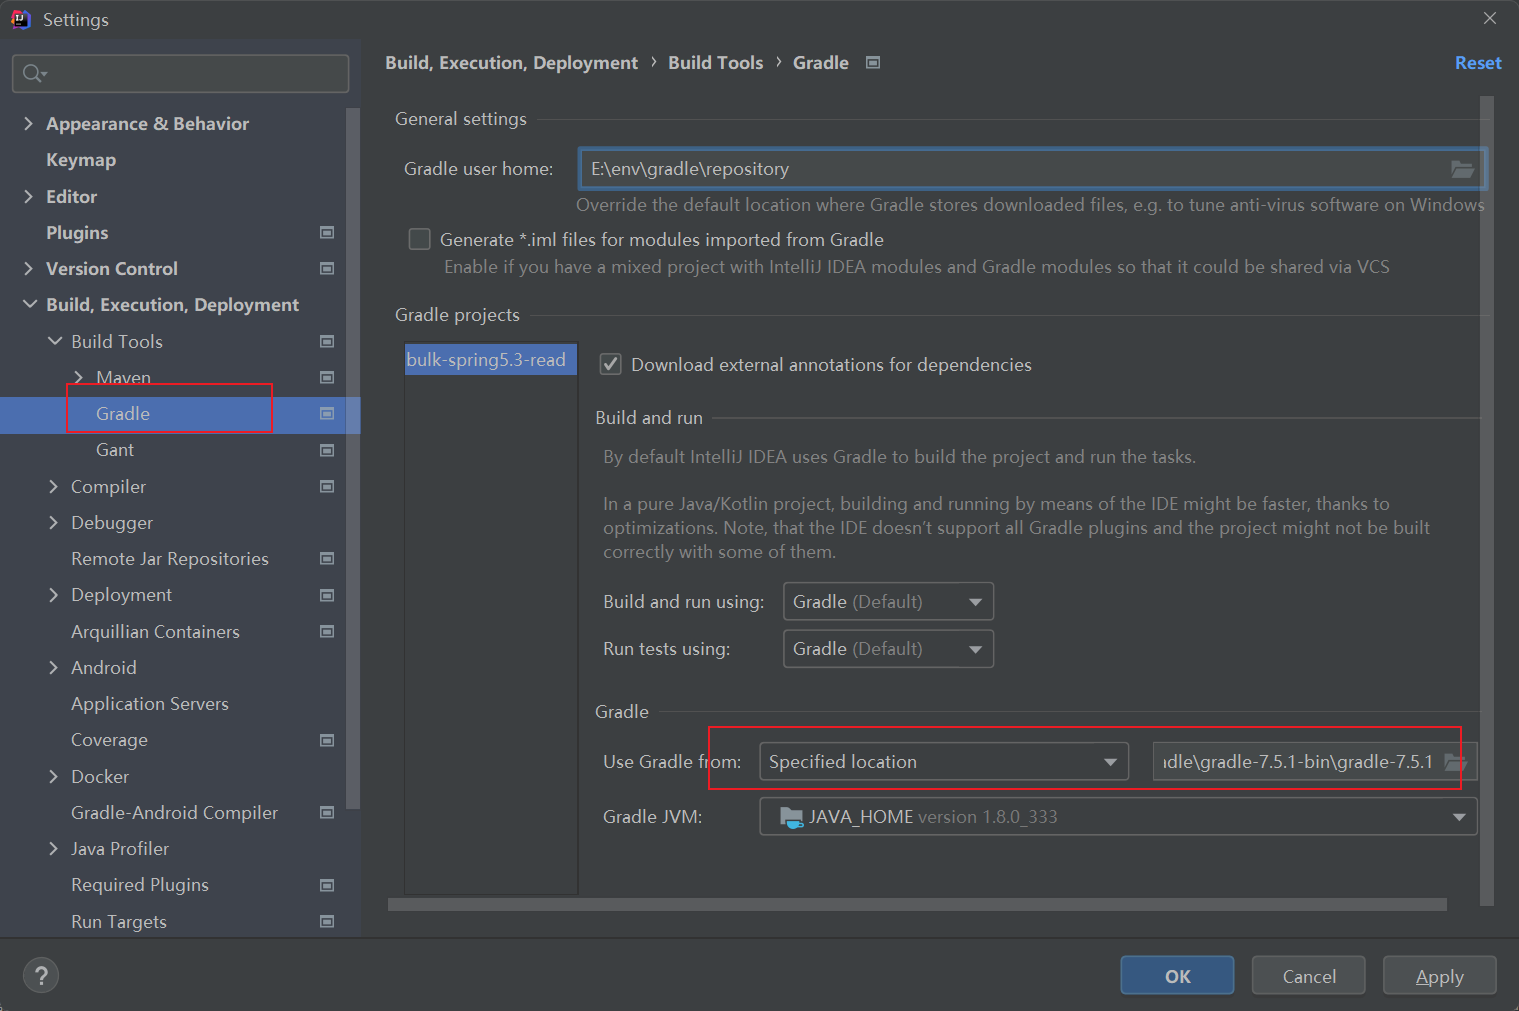
# 配置 Gradle
安装可以看这里Gradle安装&配置
配置一下 idea 的 gradle使用本地 gradle。因为本地我配置了镜像之类
修改项目文件中的
build.gradle 中的 repositories 新增 maven 的阿里云镜像
repositories {
			maven { url "https://maven.aliyun.com/repository/public" }
			mavenCentral()
			maven { url "https://repo.spring.io/libs-spring-framework-build" }
		}
2
3
4
5
setting.gradle 中 maven 的阿里云镜像
pluginManagement {
	repositories {
		maven { url "https://maven.aliyun.com/repository/public" }
		mavenCentral()
		gradlePluginPortal()
		maven { url "https://repo.spring.io/release" }
	}
}
2
3
4
5
6
7
8
至此,gradle的配置基本完成,剩下的就是等待 idea 将项目编译完成。
当然这一步可能会比较久,依赖于网络和电脑配置。
# 配置Spring
项目编译完成之后,要想启动还需要做其他的操作
其实这里的操作,在 spring-framework 的import-into-idea.md文件中有说明
以下是官方文件中的说明
_Within your locally cloned spring-framework working directory:_
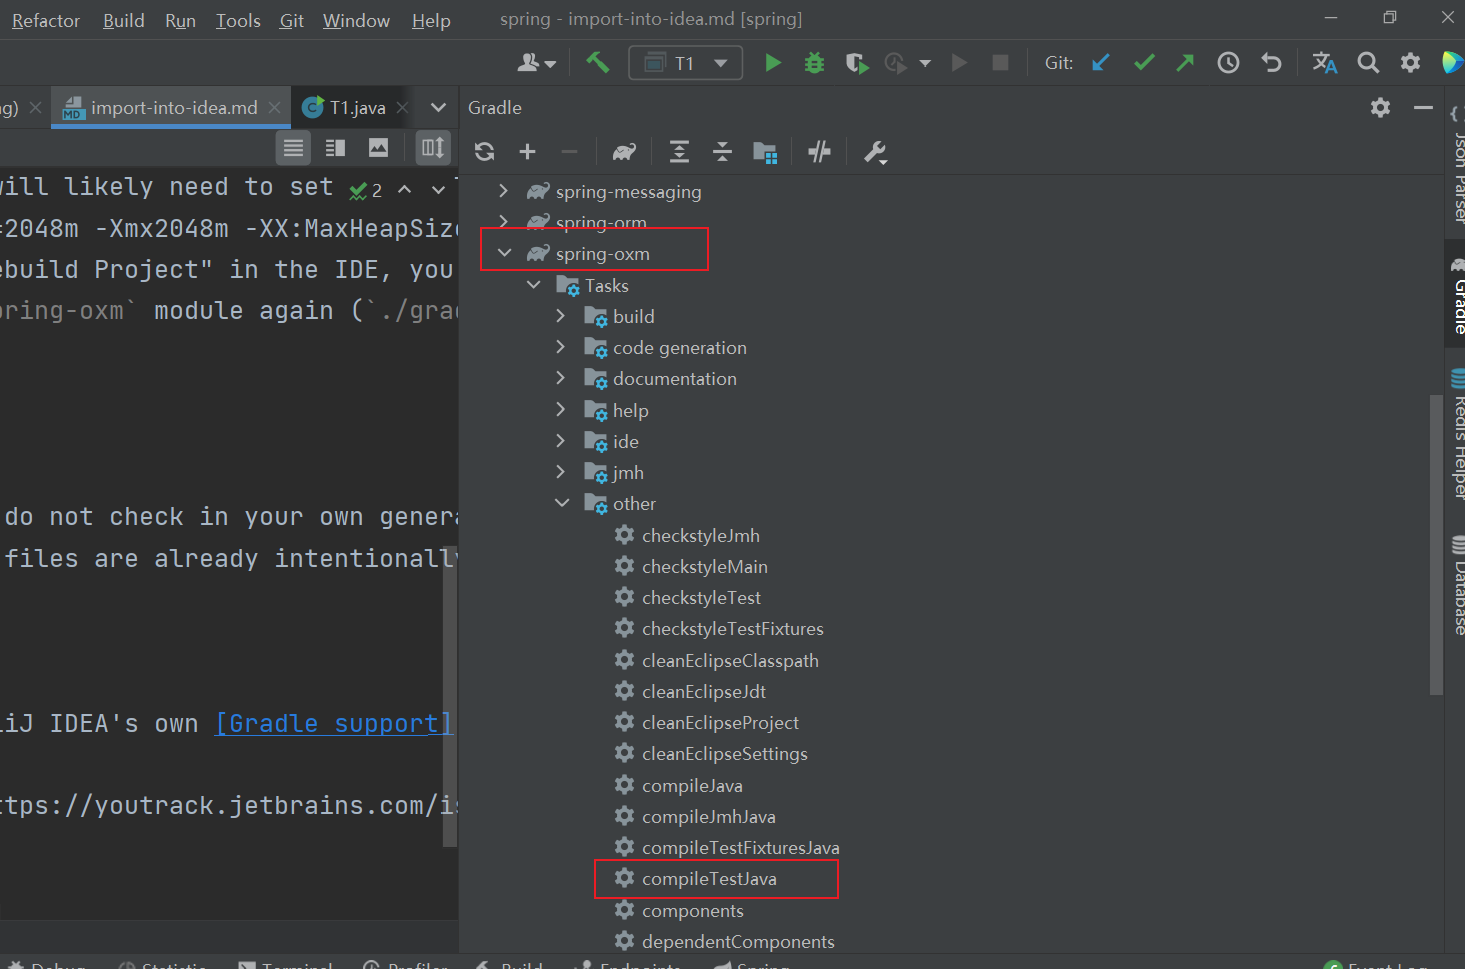
1. Precompile `spring-oxm` with `./gradlew :spring-oxm:compileTestJava`
2. Import into IntelliJ (File -> New -> Project from Existing Sources -> Navigate to directory -> Select build.gradle)
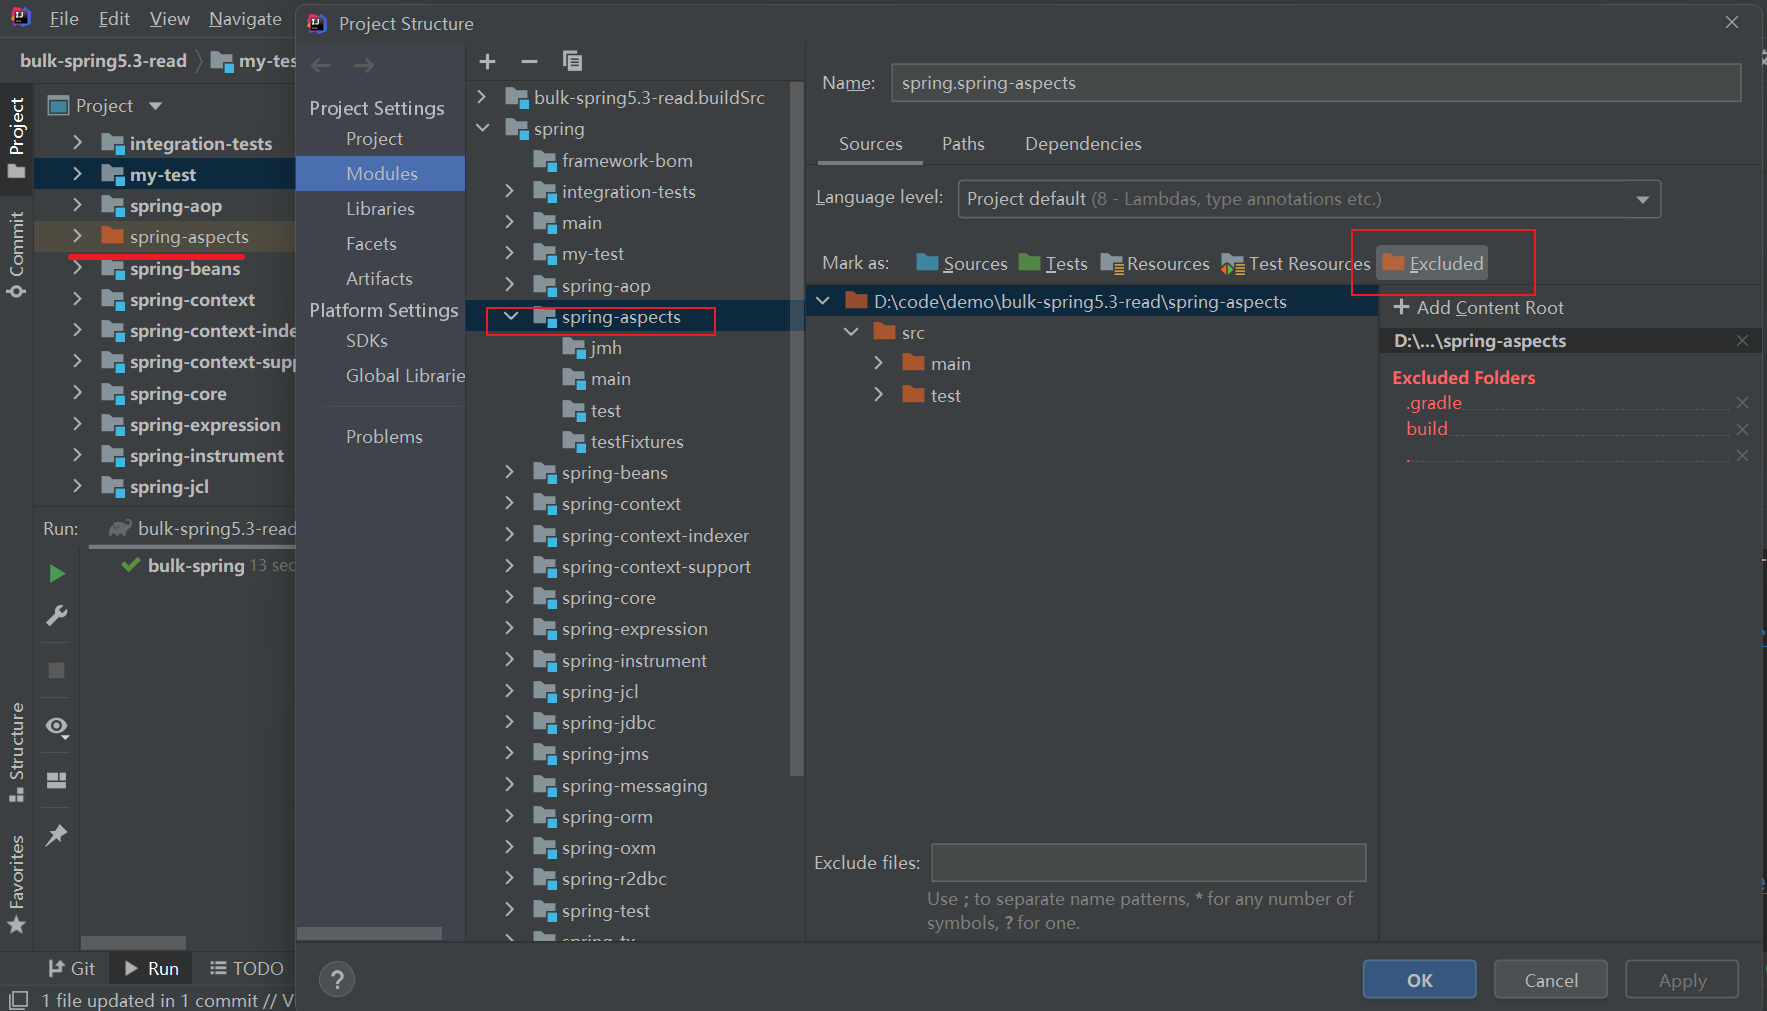
3. When prompted exclude the `spring-aspects` module (or after the import via File-> Project Structure -> Modules)
4. Code away
2
3
4
5
6
翻译过来就是
- 需要执行
spring-oxm下的 compileTestJava 命令 - 导入文件,因为我们是通过idea导入,就不需要这一步,如果你是git命令行拉去,则需要用idea导入一下项目
- 忽略
spring-aspects模块(“spring-aspects”由于引用了 IntelliJ IDEA 未知的方面类型,因此无法编译更懂可以查看这里 (opens new window))
这里展示一下,compileTestJava 怎么执行
按照图中位置,双击即可
忽略的操作 ,忽略后,在项目文件中会变黄
# 测试
在上面配置都完成了,我们可以创建一个自己的模块,去启动spring
新建一个自己的module来做测试
新建module 的 build.gradle 如下
plugins {
//    id 'java'
    id 'java-library'
    id 'war'
}

group 'org.springframework'
version '5.3.32-SNAPSHOT'

repositories {
    mavenCentral()
}

dependencies {
    api(project(":spring-context"))
    testImplementation 'junit:junit:4.11'
    testImplementation 'org.junit.jupiter:junit-jupiter-api:5.7.0'
    testRuntimeOnly 'org.junit.jupiter:junit-jupiter-engine:5.7.0'
}

test {
    useJUnitPlatform()
}
2
3
4
5
6
7
8
9
10
11
12
13
14
15
16
17
18
19
20
21
22
23
新建一个实体类 DemoEntity 用作spring bean
public class DemoEntity {
	private Integer id = 1;
	private String name ;

	public DemoEntity() {
	}

	public DemoEntity(Integer id, String name) {
		this.id = id;
		this.name = name;
	}

	public Integer getId() {
		return id;
	}

	public void setId(Integer id) {
		this.id = id;
	}

	public String getName() {
		return name;
	}

	public void setName(String name) {
		this.name = name;
	}
}
2
3
4
5
6
7
8
9
10
11
12
13
14
15
16
17
18
19
20
21
22
23
24
25
26
27
28
29
新建一个配置类 DemoConfig
@Configuration
public class DemoConfig {

	@Bean
	public DemoEntity demoEntity() {
		return new DemoEntity(10086,"测试");
	}
}
2
3
4
5
6
7
8
新建一个启动类 T1
public class T1 {
	public static void main(String[] args) {
		String version = SpringVersion.getVersion();
//		ClassPathXmlApplicationContext context = new ClassPathXmlApplicationContext("applicationContext.xml");
		AnnotationConfigApplicationContext context = new AnnotationConfigApplicationContext(DemoConfig.class);
		DemoEntity bean = context.getBean(DemoEntity.class);
		System.out.println(bean);
	}
}
2
3
4
5
6
7
8
9
然后执行T1即测试